What Factors Should I Consider When Selecting A Roofing Contractor In Long Beach? – Best Roofing Solution – Long Beach

Selecting the right Long Beach Roofing Contractor is a crucial decision that can significantly impact the longevity and performance of your roof.

With numerous options available, it’s essential to consider various factors to ensure you choose a reliable and skilled professional. In this guide, we will walk you through the key factors to consider when selecting a roofing contractor in Long Beach, providing you with the knowledge needed to make an informed decision.

Reputation and Reviews

One of the first factors to consider is the reputation of the roofing contractor. A reputable contractor will have positive reviews and testimonials from satisfied customers. Look for online reviews on platforms like Google, Yelp, or the contractor’s website. Additionally, seek recommendations from friends, family, or neighbors who have had roofing work done.

Licensing and Certifications

Ensure that the roofing contractor is licensed and certified to operate in Long Beach. A valid license indicates that the contractor has met the necessary legal requirements to perform roofing work in the area. Certifications from industry associations further demonstrate a commitment to professionalism and ongoing education in the field.

Experience in Long Beach

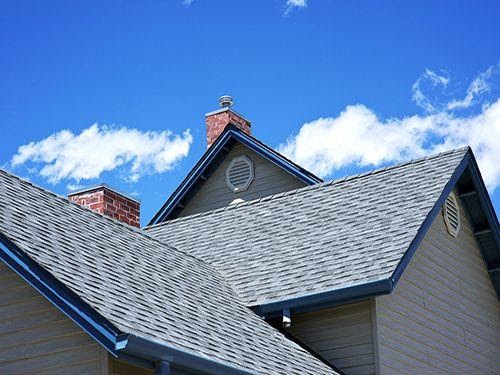
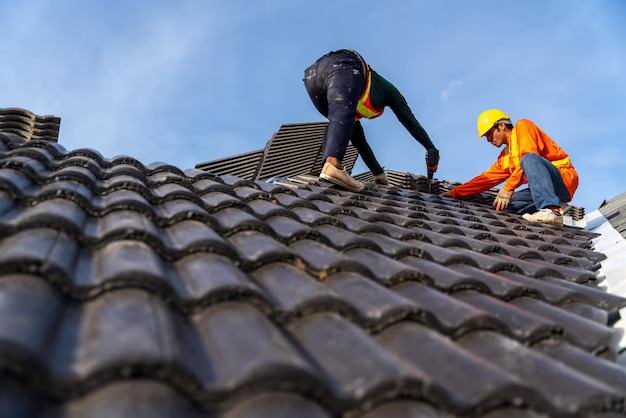
Experience in the local area is essential. A roofing contractor familiar with the unique climate and challenges of Long Beach is better equipped to provide suitable solutions. They understand the impact of salt air from the ocean, occasional storms, and the overall weather conditions that can affect the longevity of your roof.

Insurance Coverage

Verify that the roofing contractor has adequate insurance coverage. This includes both liability insurance and workers’ compensation insurance. Liability insurance protects you in case of property damage during the project, while workers’ compensation insurance ensures that you won’t be held liable for any injuries sustained by the contractor’s workers on your property.

Transparent Contract and Estimates

A reputable roofing contractor will provide a clear and detailed contract, outlining the scope of work, materials to be used, project timelines, and payment terms. Be wary of contractors who provide vague estimates or contracts with unclear terms. A transparent and well-documented agreement helps prevent misunderstandings and ensures that both parties are on the same page.

Local Presence and References

A contractor with a local presence and established reputation is preferable. Local contractors are more invested in maintaining their reputation within the community, and they are often familiar with local building codes and regulations. Ask for references from past customers in Long Beach to get firsthand insights into the contractor’s work quality and professionalism.

Warranty and Guarantees

Inquire about the warranties and guarantees offered by the roofing contractor. A reliable contractor stands by their work and provides assurances for the materials used and the labor performed. Be sure to understand the terms of the warranty and what is covered in case issues arise after the completion of the project.

Communication and Responsiveness

Effective communication is crucial throughout the roofing project. Assess the contractor’s responsiveness to your inquiries, whether through phone calls, emails, or in-person meetings. A contractor who communicates promptly and clearly is more likely to address any concerns or questions you may have during the project.

Quality of Materials

Discuss the materials that the contractor intends to use for your roofing project. A reputable contractor will use high-quality materials from trusted manufacturers. Understanding the durability and lifespan of the materials is essential in making informed decisions about the long-term performance of your roof.

Local Knowledge and Building Codes

A roofing contractor with local knowledge is better equipped to navigate Long Beach’s specific building codes and regulations. Compliance with these codes is essential to ensure that your roofing project meets the necessary standards and passes inspections.

Payment Terms and Financing Options

Clarify the payment terms with the contractor before starting the project. Be cautious of contractors who demand full payment upfront. Reliable contractors typically work on a payment schedule tied to project milestones. Additionally, inquire about any financing options that the contractor may offer to make the project more manageable within your budget.

Professionalism and Workmanship

Observe the professionalism and workmanship of the contractor and their crew. A professional contractor takes pride in their work and maintains a clean and organized work site. Pay attention to details, such as how well the contractor explains the project, their punctuality, and the overall demeanor of their team.

Environmental Considerations

For homeowners with an eco-friendly mindset, consider a roofing contractor who incorporates sustainable and environmentally friendly practices. Some contractors may offer recycled or energy-efficient roofing materials, contributing to both environmental conservation and long-term energy savings.

Check the Better Business Bureau (BBB) Rating

The Better Business Bureau (BBB) is a valuable resource for assessing the credibility of a roofing contractor. Check the contractor’s BBB rating and any customer complaints or reviews. A high BBB rating indicates a commitment to ethical business practices and customer satisfaction.

Conclusion:

Selecting the right Long Beach Roofing Contractor requires careful consideration of various factors, from reputation and experience to licensing and insurance coverage. By thoroughly vetting potential contractors and asking the right questions, you can ensure that your roofing project is in capable hands. Remember that investing time in selecting the right contractor upfront can save you from potential headaches and costly issues down the line.

Best Roofing Solution – Long Beach

4447 Rutgers Ave, Long Beach, CA 90808, United States

1-562-265-3147

How To Find Commercial Roofing Solutions In Irvine? – Best Roofing Solution – Irvine

The bustling business landscape in Irvine demands robust and reliable commercial Roofing Contractor Irvine CA .

Whether you are a property owner looking to invest in a new roof or a business manager seeking maintenance services, finding the right commercial roofing solution is critical. In this guide, we’ll explore the key steps and considerations to help you navigate the realm of commercial roofing in Irvine.

I. Assess Your Commercial Roofing Needs

Identify Roofing Issues

Start by assessing the current state of your commercial roof. Identify any visible issues such as leaks, damage, or wear and tear. Understanding the specific problems will guide you in selecting the most appropriate commercial roofing solutions.

Determine Long-Term Goals

Consider your long-term goals for the commercial property. Are you looking for a roofing solution that provides longevity and durability, or are you focused on energy efficiency and sustainability? Understanding your goals will shape your choices in terms of materials and services.

II. Research Local Commercial Roofing Companies

Local Expertise

Look for commercial roofing companies with local expertise in Irvine. A company familiar with the local climate, building codes, and architectural styles will be better equipped to provide tailored solutions. Local experience also ensures a quicker response to specific regional challenges.

Check Reviews and References

Explore online reviews and ask for references from commercial roofing companies. Positive reviews and satisfied customers are indicators of a company’s reliability and quality of service. Contacting references directly can provide valuable insights into the company’s workmanship and customer relations.

III. Consider Roofing Materials and Styles

Assess Material Options

Commercial roofing offers a variety of material options, each with its own set of benefits and considerations. Common materials include:

  1. Single-Ply Membrane: Offers durability and energy efficiency.
  2. Metal Roofing: Known for longevity and resistance to elements.
  3. Built-Up Roofing (BUR): Provides excellent waterproofing and insulation.
  4. Modified Bitumen: Combines the benefits of built-up roofing with modern technology.

Energy Efficiency

Consider energy-efficient roofing materials to contribute to sustainability and reduce long-term operational costs. Cool roofing options, such as reflective membranes, can help regulate indoor temperatures, especially in Irvine’s warm climate.

IV. Schedule Professional Roof Inspection

Hire a Roofing Consultant

Engage a professional roofing consultant or inspector to assess the current state of your commercial roof. Their expertise will help identify hidden issues, determine the remaining lifespan of the roof, and provide recommendations for necessary repairs or replacements.

Obtain Multiple Quotes

Request quotes from different commercial roofing companies based on the findings of the roof inspection. The quotes should include a breakdown of costs, materials, labor, and project timelines. Comparing quotes will help you make an informed decision while considering budget constraints.

V. Check Licensing and Insurance

Verify Licensing

Ensure that the commercial roofing company holds the necessary licenses to operate in California. Licensing indicates compliance with industry regulations and adherence to quality standards.

Insurance Coverage

Check for adequate insurance coverage, including liability insurance and workers’ compensation. Insurance protects you from potential liabilities in case of accidents or injuries during the roofing project.

VI. Environmental Considerations

Sustainability Practices

If environmental sustainability is a priority, inquire about the roofing company’s commitment to sustainable practices. Some commercial roofing materials are recyclable or made from eco-friendly materials.

Green Roofing Options

Explore the possibility of green roofing solutions, such as living roofs or rooftop gardens. Green roofs contribute to energy efficiency, improve air quality, and add an aesthetic appeal to commercial properties.

VII. Budget Considerations and Financing Options

Establish a Budget

Determine a realistic budget for your commercial roofing project. Consider not only the upfront costs but also long-term maintenance and operational savings offered by certain roofing materials.

Explore Financing Plans

Many commercial roofing companies offer financing plans to help businesses manage the upfront costs of roofing projects. Explore these options to find a plan that aligns with your budget and financial goals.

VIII. Regulatory Compliance and Permits

Understand Local Regulations

Irvine, like any city, has specific building codes and regulations. Ensure that your chosen commercial roofing solution complies with these codes. The roofing company should be familiar with local requirements and obtain the necessary permits for the project.

Accessibility for Inspections

Choose roofing materials and designs that facilitate easy access for inspections and maintenance. Regular inspections are crucial for identifying and addressing potential issues before they escalate.

IX. Warranty and Maintenance Plans

Warranty on Workmanship

Inquire about the warranty on the roofing company’s workmanship. A reputable commercial roofing company should stand behind its work and offer a warranty that covers any issues arising from faulty installation or workmanship.

Maintenance Plans

Consider opting for a maintenance plan offered by the roofing company. Regular maintenance ensures the longevity of the roof and helps prevent costly repairs. Discuss the frequency and scope of maintenance services included in the plan.

X. Communication and Project Management

Clear Communication

Choose a commercial roofing company with a reputation for clear and transparent communication. Effective communication ensures that you are informed about project progress, potential delays, and any changes to the plan.

Project Management

Evaluate the project management capabilities of the roofing company. A well-managed project adheres to timelines, stays within budget, and minimizes disruptions to your commercial operations.

Conclusion:

In conclusion, navigating commercial Roofing Contractor Irvine CA  in Irvine involves a comprehensive approach that considers your specific needs, local expertise, material options, and regulatory compliance. By conducting thorough research, obtaining professional inspections, and working with reputable roofing companies, you can ensure a successful commercial roofing project that enhances the longevity and functionality of your property.

Best Roofing Solution – Irvine

17482 Luther Ave, Irvine, CA 92614, United States

1-949-990-6180

How To Program Overhead Door Garage Door Opener – First Call Garage Doors


Programming an Garage Door Repair Richmond TX involves syncing your remote control or keypad with the opener unit, allowing you to conveniently operate your garage door. The following comprehensive guide provides general steps for programming Overhead Door garage door openers.

Keep in mind that specific instructions may vary based on your opener model, so always refer to your opener and remote or keypad manuals for accurate guidance.

1. Identify Your Overhead Door Opener Model:

  • Before starting the programming process, identify the model of your Overhead Door garage door opener. This information is essential as programming steps can vary.

2. Prepare the Remote Control or Keypad:

  • Ensure that the battery in your remote control or keypad is fresh and properly installed. Weak or dead batteries can affect the programming process.

3. Locate the “Learn” or “Program” Button on the Opener:

  • Most Overhead Door garage door openers have a “Learn” or “Program” button, usually located on the motor unit or near the opener’s controls. Identify and locate this button before starting the programming process. The color of the button may vary (red, yellow, green, or purple).

4. Clear Existing Codes (if necessary):

  • If you are adding a new remote control or experiencing issues, it’s advisable to clear the memory of the opener before programming. Press and hold the “Learn” or “Program” button until the indicator light on the opener blinks, indicating that the memory has been cleared.

5. Locate the Remote Control or Keypad’s Program Button:

  • Remote controls and keypads typically have a “Program” or “Learn” button. Find and locate this button on your specific remote or keypad.

6. Enter Programming Mode on the Opener:

  • Press and release the “Learn” or “Program” button on the garage door opener motor unit. The indicator light on the opener should start blinking, indicating that the opener is ready to learn a new code.

7. Press the Remote Control or Keypad’s Program Button:

  • Press and hold the “Program” or “Learn” button on the remote control or keypad. The indicator light on the remote or keypad should start blinking.

8. Enter the Programming Code:

  • Enter the programming code on the remote control or keypad while the indicator light is blinking. Refer to your opener’s manual for specific instructions on entering the code.

9. Confirm Programming:

  • After entering the programming code, press the main button or “Enter” button on the remote control or keypad to confirm the programming. The indicator light on the opener should stop blinking, indicating that the remote or keypad is successfully programmed.

10. Test the Remote Control or Keypad:

  • Test the remote control or keypad by pressing the programmed button or entering the PIN and pressing “Enter.” The garage door should respond by opening or closing. If it doesn’t, repeat the programming steps.

11. Program Additional Remotes or Keypads (if needed):

  • If you have multiple remotes or keypads to program, repeat the above steps for each additional device.

12. Homelink Integration (if applicable):

  • If your vehicle is equipped with a Homelink system, you may want to program your Overhead Door opener to work with it. Refer to your vehicle’s owner’s manual for Homelink programming instructions.

13. Security+ 2.0 Technology (if applicable):

  • Some Overhead Door openers use Security+ 2.0 technology for enhanced security. If your opener is equipped with this feature, programming may involve additional steps. Refer to your opener’s manual for specific Security+ 2.0 programming instructions.

14. Troubleshooting:

  • If the programming process is unsuccessful, consider the following:
    • Ensure the remote control or keypad is within range of the garage door opener.
    • Confirm that the battery in the remote control or keypad is functional.
    • Verify that the garage door opener’s antenna is properly extended.
    • Repeat the programming steps carefully.

15. Keep the Manuals for Future Reference:

  • Once you have successfully programmed your Overhead Door garage door opener, keep both the opener and remote or keypad manuals in a safe place for future reference. They contain valuable information about troubleshooting, maintenance, and additional features.

16. Explore Advanced Features (if applicable):

  • Overhead Door openers may offer advanced features such as timer-to-close functions, smartphone compatibility, or integration with smart home systems. Consult your opener’s manual for details on these advanced features.

Conclusion:

Programming your Garage Door Repair Richmond TX is a relatively simple process that enhances the convenience and accessibility of your garage door system. Following the manufacturer’s instructions and paying attention to specific details for your model ensures a successful programming experience. If you encounter any challenges, refer to your manuals or contact Overhead Door customer support for assistance.

First Call Garage Doors

20527 Farm to Market 1093 Unit B205, Richmond, TX 77407, United States

1-713-248-2684

How To Install New Garage Door Opener – EDM Garage Doors, LLC

Installing a new Garage Door Repair Volo IL can enhance the security and convenience of your garage.

Whether you are replacing an old unit or installing one for the first time, it’s crucial to follow the manufacturer’s instructions and safety guidelines. Here’s a detailed guide on how to install a new garage door opener:

1.Choose the Right Opener: Before purchasing a new garage door opener, consider the type of drive system (chain, belt, or screw), horsepower, and additional features such as smart capabilities. Ensure that the opener is compatible with your garage door size and weight.

2.Gather Tools and Materials: Collect the necessary tools and materials for the installation, including a power drill, adjustable wrench, screwdrivers, pliers, a level, a tape measure, and safety equipment such as safety glasses and gloves. Also, ensure you have all the components provided in the garage door opener kit.

3.Read the Manual: Carefully read the manufacturer’s manual that comes with the garage door opener. The manual provides specific instructions, safety precautions, and diagrams that will guide you through the installation process.

4.Disconnect Power to the Existing Opener: If you are replacing an old garage door opener, disconnect power to the existing unit. Unplug it from the electrical outlet or turn off the circuit breaker connected to the garage door opener to ensure safety during the installation process.

5.Remove the Old Opener (if applicable): If replacing an existing garage door opener, uninstall it by disconnecting the mounting brackets, releasing the door from the opener, and detaching the opener from the ceiling. Follow the instructions in the manual for your specific opener model.

6.Assemble the New Opener: Follow the instructions in the manual to assemble the new garage door opener. This typically involves attaching the rail segments, motor unit, and other components. Ensure all parts are securely connected according to the manufacturer’s guidelines.

7.Install the Rail: Position and secure the rail along the ceiling of the garage according to the instructions. Use the provided brackets to attach the rail securely. The rail is a crucial component that guides the garage door opener’s movement.

8. Mount the Motor Unit: Attach the motor unit to the ceiling brackets, ensuring it is centered and level. Secure it in place using the provided hardware. The motor unit houses the motor and controls the operation of the garage door opener.

9.Install the Trolley and Arm: Attach the trolley to the rail and connect the arm to the trolley. The arm is responsible for carrying the attachment to the garage door itself. Ensure the trolley is securely engaged with the opener’s drive mechanism.

10.Attach the Header Bracket: Install the header bracket to the ceiling above the garage door. Ensure it is securely fastened and aligned. The header bracket is a crucial support structure that holds the opener in place.

11.Connect the Door Arm and Trolley: Connect the garage door arm to the trolley. Follow the instructions in the manual to ensure proper alignment and secure attachment. This linkage is essential for the garage door opener to control the movement of the door.

12.Wire the Opener: Follow the wiring instructions provided in the manual to connect the opener to power. Use the included safety sensor wires to connect the sensors on either side of the garage door. Ensure all wiring is secure and follows safety guidelines.

13. Program the Opener: Program the garage door opener according to the manufacturer’s instructions. This may involve setting the travel limits, adjusting the force settings, and programming any remote controls or keypads that come with the opener.

14.Test the Opener: Before using the garage door opener regularly, perform a series of tests. Open and close the door several times using the remote control, wall switch, and keypad if applicable. Check for smooth operation and listen for any unusual noises.

15. Adjust Settings as Needed: If necessary, adjust the travel limits and force settings to ensure the door operates smoothly and stops when it should. Follow the manufacturer’s guidelines for making these adjustments.

16.Install the Manual Release: In case of a power outage, ensure the manual release mechanism is installed and functioning correctly. This allows you to disengage the garage door opener and operate the door manually.

17.Secure Safety Features: Ensure that all safety features, such as the safety sensors, are functioning correctly. Test the sensors by placing an object in the door’s path while closing to ensure the opener reverses as expected.

18.Secure the Opener: Once all adjustments are made and the opener is functioning correctly, secure it to the ceiling and wall following the manufacturer’s recommendations. Use the provided hardware to prevent any movement during operation.

19. Install the Light Bulbs (if applicable): If your garage door opener comes with built-in lights, install the recommended light bulbs. Follow the specifications provided in the manual to avoid damage to the opener.

20.Readjust if Necessary: After some use, recheck the settings and adjustments. Make any necessary readjustments to ensure optimal performance and address any issues that may arise.

In conclusion, installing a new Garage Door Repair Volo IL involves careful planning, following manufacturer instructions, and ensuring all safety guidelines are observed. Taking the time to install the opener correctly will result in reliable and efficient operation, providing you with a secure and convenient garage access solution. If you encounter any challenges or are unsure about any step, consider consulting a professional garage door installer for assistance.

EDM Garage Doors, LLC

596 Richard Brown Blvd, Volo, IL 60073, United States

1-847-416-3036

How Much Does A Garage Door Cost To Replace – Dynamo Overhead Garage Doors LLC

The cost to replace a Garage Door Repair Conroe TX can vary widely depending on several factors, including the type of door, material, size, design, and additional features. In this comprehensive guide, we’ll explore the various factors that influence the cost of garage door replacement and provide insights to help you make an informed decision.

1. Types of Garage Doors:

  • There are several types of garage doors, each with its own characteristics and cost considerations:

a. Sectional Garage Doors: – Sectional doors are the most common type, consisting of panels that slide up and overhead along tracks. They come in various materials and designs.

b. Roll-Up Garage Doors: – Roll-up doors, also known as coiling doors, roll vertically into a coil above the door opening. They are often used in commercial settings.

c. Side-Hinged Garage Doors: – Side-hinged doors swing open from a hinged frame, much like traditional entry doors. They are less common but offer a classic aesthetic.

d. Sliding Garage Doors: – Sliding doors operate on horizontal tracks, sliding to the side to open. They are a unique choice for specific applications.

e. Tilt-Up Garage Doors: – Tilt-up doors, also known as canopy or retractable doors, tilt outward and then slide up into the ceiling space. They are less common in residential settings.

2. Garage Door Materials:

  • The material of the garage door significantly influences the cost. Common materials include:

a. Steel: – Steel doors are durable, low-maintenance, and come in various styles. They are often more affordable than some other materials.

b. Wood: – Wooden doors offer a classic and aesthetically pleasing look. They tend to be more expensive and may require more maintenance.

c. Aluminum: – Aluminum doors are lightweight, resistant to corrosion, and can be less expensive than some other materials.

d. Vinyl: – Vinyl doors are durable, require minimal maintenance, and are available in various styles. They can be cost-effective.

e. Fiberglass: – Fiberglass doors are lightweight, resistant to corrosion, and can mimic the appearance of wood. They may be mid-range in terms of cost.

3. Design and Style:

  • The design and style of the garage door can impact the cost. Custom designs, decorative elements, and unique finishes may increase the overall price.

4. Insulation:

  • Insulated garage doors offer energy efficiency benefits and can be more expensive than non-insulated options. The level of insulation and R-value can influence the cost.

5. Size of the Garage Door:

  • Larger garage doors generally cost more than smaller ones. Standard single-car and double-car garage doors have different price points.

6. Additional Features:

  • Additional features and options, such as windows, decorative hardware, smart technology integration, and advanced security features, can contribute to the overall cost.

7. Installation Costs:

  • Professional installation costs are a significant part of the total expense. Installation fees may vary based on the complexity of the job, the need for removal of the existing door, and any additional modifications required.

8. Location and Local Factors:

  • Regional variations in labor and material costs, as well as local building codes and regulations, can influence the overall cost of garage door replacement.

9. Brand and Manufacturer:

  • The brand and manufacturer of the garage door can impact the cost. Well-known and reputable brands may command higher prices.

10. DIY vs. Professional Installation: – While some homeowners may attempt a DIY installation to save money, professional installation is recommended for safety and optimal functionality. Professional installation costs should be factored into the overall budget.

11. Warranty and Maintenance: – The warranty offered by the manufacturer can affect the cost. Doors with longer warranties or additional maintenance features may have a higher initial price.

Conclusion:

The cost to replace a Garage Door Repair Conroe TX can vary widely based on factors such as the type of door, material, size, design, insulation, additional features, installation, location, and brand. It’s essential to consider your budget, aesthetic preferences, and functional requirements when choosing a new garage door. Obtaining multiple quotes from reputable suppliers and installers, along with understanding the long-term benefits of features like insulation and advanced technology, will help you make an informed decision. Investing in a high-quality garage door replacement can enhance the curb appeal, security, and functionality of your home.

Dynamo Overhead Garage Doors LLC

24/7 SERVICES AND EMERGENCY SERVICES (832) 270-3373

1-832-270-3373

How Do I Program My Chamberlain Garage Door Opener – Don and Son’s Garage Doors


Programming a Chamberlain Garage Door Repair Coppell TX involves several steps to ensure that the opener is synced with the remote control and other accessories.

In this detailed guide, we’ll provide step-by-step instructions to help you successfully program your Chamberlain garage door opener. Keep in mind that the specific steps may vary slightly depending on the model of your Chamberlain opener, so always refer to your opener’s manual for model-specific instructions.

1. Locate the “Learn” Button:

Chamberlain garage door openers typically have a “Learn” button on the motor unit. This button is usually located near the antenna wire and may be colored red, orange, green, or purple.

2. Clear Memory (Optional):

If you are reprogramming your garage door opener or if it’s a new installation, it’s a good idea to clear the memory first. To do this:

  • Press and hold the “Learn” button on the motor unit until the indicator light turns off. This usually takes about 6 seconds.
  • Release the button.

This clears any existing codes from the opener’s memory.

3. Program the Remote Control:

Now, let’s program the remote control to the garage door opener:

  • Press the “Learn” button on the motor unit. The indicator light will turn on and remain lit for about 30 seconds, indicating that the opener is in programming mode.
  • Within 30 seconds, press and hold the button on the remote control that you want to program. Hold the button until the indicator light on the motor unit flashes or blinks, usually within a few seconds.
  • Release the button on the remote control. The opener should now recognize the remote, and the indicator light on the motor unit will turn off.
  • Test the remote control by pressing the programmed button to open or close the garage door.

4. Program the Keyless Entry System (if applicable):

If your Chamberlain garage door opener includes a keyless entry system, follow these steps to program it:

  • Press the “Learn” button on the motor unit.
  • Within 30 seconds, enter a four-digit PIN on the keypad and press the “Enter” button.
  • The indicator light on the motor unit should flash or blink, indicating that the keyless entry system is programmed.
  • Test the keyless entry system by entering the PIN and pressing the “Enter” button.

5. Program Homelink (if applicable):

If you have a Homelink-compatible vehicle and want to program it to your Chamberlain garage door opener, follow these steps:

  • Press and hold the two outer buttons on the Homelink system in your vehicle until the indicator light begins to flash or change color.
  • Place the handheld remote control 1-3 inches away from the Homelink buttons.
  • Simultaneously press and hold the button on the remote control and the desired button on the Homelink system. Hold both buttons until the indicator light on the Homelink system changes or flashes.
  • Test the Homelink system by pressing the programmed button to operate the garage door.

6. Program MyQ Smart Garage Hub (if applicable):

If your Chamberlain opener is MyQ-enabled and you have a MyQ Smart Garage Hub, you can control your garage door opener using a smartphone. Follow these steps:

  • Download and install the MyQ app on your smartphone.
  • Follow the app’s instructions to set up an account and add your garage door opener.
  • Connect the MyQ Smart Garage Hub to your garage door opener following the manufacturer’s instructions.
  • Test the MyQ app by opening and closing the garage door from your smartphone.

7. Additional Tips:

  • If you have multiple remotes, keyless entry systems, or Homelink buttons, repeat the programming steps for each device.
  • If you experience any issues during programming, refer to your Chamberlain opener’s manual for troubleshooting tips.
  • Keep the remote control and other programmed devices out of reach of unauthorized users to ensure security.

Conclusion:

Programming a Chamberlain Garage Door Repair Coppell TX involves straightforward steps, including locating the “Learn” button, clearing memory if necessary, and programming remote controls, keyless entry systems, Homelink, and MyQ Smart Garage Hub. Following the manufacturer’s instructions and referring to your specific opener’s manual will help ensure a successful programming process. Once programmed, you can enjoy the convenience of operating your garage door with various devices and systems.

Don and Son’s Garage Doors

1-214-415-4109

How To Program Mastercraft Garage Door Opener – Circle B Overhead Door

Programming a Mastercraft Garage Door Repair Bryan TX involves a series of steps that can vary based on the specific model you have.

Mastercraft is a private brand owned by Canadian Tire, and their garage door openers may have different programming procedures. Below is a comprehensive guide that covers the general steps for programming a Mastercraft garage door opener:

1. Gather Necessary Information

Before starting the programming process, make sure you have the following information:

  • Model numbers of both the garage door opener and the remote.
  • Access to the garage door opener unit.
  • A working knowledge of the garage door opener system.

2. Identify the Type of Opener

Mastercraft garage door openers typically use either DIP switches or a “learn” button for programming.

  • DIP Switches: These are small switches that can be in either the remote or the main unit. They need to be set to the same position for communication.
  • Learn Button: This is a colored button on the motor unit that you’ll press during programming.

3. Locate DIP Switches or Learn Button

If your opener uses DIP switches, open both the remote control and the garage door opener unit to find the switches. Set them to the same position in both the remote and the opener.

If your opener uses a “learn” button, find the button on the motor unit. It’s usually a colored button near the antenna wire.

4. Clear Existing Codes (if necessary)

Before programming a new remote, clear existing codes for security. Check your manual for instructions, which often involve holding down a button on the opener until a light blinks.

5. Program the Remote

  • For DIP Switches:
    • Open the remote control and the garage door opener unit to locate the DIP switches.
    • Use a pen or similar tool to set the DIP switches on the remote to match those on the garage door opener.
    • Reassemble the remote.
  • For Learn Button:
    • Press and release the “learn” button on the motor unit.
    • The indicator light on the unit should light up. Within 30 seconds, press and hold the button on the remote that you want to program. Release the button when the light on the motor unit blinks.

6. Test the Remote

After programming, test the remote to ensure it works properly. Stand within range of the opener and press the programmed button on the remote. The door should respond accordingly.

7. Repeat if Necessary

If you have multiple remotes, repeat the programming process for each one.

8. Troubleshooting

If the remote doesn’t work, double-check the DIP switches or repeat the programming process. Make sure you are within the specified range and that there are no obstructions.

9. Additional Tips and Considerations

  • Battery Check: Ensure the remote’s battery is in good condition, as weak batteries can affect performance.
  • Security Features: Familiarize yourself with any advanced security features your garage door opener might have and follow additional steps in the manual if needed.

Conclusion:

By following these general steps, you should be able to program your Mastercraft Garage Door Repair Bryan TX successfully. Always refer to your specific model’s manual for accurate and model-specific instructions. If you encounter any challenges, don’t hesitate to seek assistance from Canadian Tire’s customer support or consult professional help.

Circle B Overhead Door

1818 Drillers Dr, Bryan, TX 77808, United States

1-979-324-6733

How Should I Proceed If The Garage Door Spring Is Already Broken? – Camco Commercial Door Company

A broken Knoxville Garage Door Repair is a significant issue that can disrupt the smooth operation of your garage door, posing safety risks and inconvenience.

When faced with a broken spring, it’s crucial to take immediate action to address the situation and ensure the safety of your property and those within. In this comprehensive guide, we will explore what to do if your garage door spring is already broken, the potential risks involved, and the professional solutions to restore your garage door to optimal functionality.

1. Recognizing the Signs of a Broken Garage Door Spring:

Before delving into what to do, it’s essential to recognize the signs of a broken garage door spring. Common indicators include:

A loud snapping or banging sound during door operation.

An imbalanced or uneven garage door.

Difficulty in manually lifting the door.

Visible damage or separation of the spring coils.

If you observe any of these signs, it’s crucial to refrain from using the garage door until the issue is addressed.

2. Immediate Actions When the Garage Door Spring is Broken:

When faced with a broken garage door spring, taking immediate actions can help minimize potential risks and ensure the safety of your property and occupants. Here’s what to do:

a. Avoid Using the Garage Door:

Refrain from attempting to open or close the garage door manually or using the opener.

Do not force the door to operate, as this can exacerbate the issue and lead to further damage.

b. Secure the Area:

 If the garage door is partially open, secure the area to prevent unauthorized access and ensure the safety of pets, children, and belongings.

Avoid leaving the door in a partially open position, as it can fall unexpectedly.

c. Disconnect the Opener:

If the garage door is equipped with an automatic opener, disconnect it from the power source to prevent accidental activation.

This reduces the risk of the door moving unexpectedly and causing further damage.

d. Contact Professional Assistance:

It’s advisable to seek professional assistance promptly. Attempting to repair or replace a broken garage door spring without the necessary expertise can be dangerous and may lead to further damage.

3. Risks Associated with Broken Garage Door Springs:

Understanding the risks associated with broken garage door springs underscores the importance of immediate attention and professional intervention:

a. Sudden Door Closure:

A broken spring can result in the sudden closure of the garage door, posing a significant safety hazard to anyone in the vicinity.

This can cause injury to individuals or damage to vehicles and belongings.

b. Imbalanced Door Operation:

A broken spring leads to an imbalanced door, making it difficult to lift manually and causing strain on the garage door opener.

Continued use in this condition can lead to additional damage to the opener and other components.

c. Potential Damage to Door Components:

The sudden release of tension from a broken spring can lead to damage to other door components, such as cables, tracks, and rollers.

Addressing the issue promptly helps prevent further damage and reduces repair costs.

4. Professional Solutions for Broken Garage Door Springs:

Seeking professional assistance is crucial when dealing with broken garage door springs. Experienced technicians have the knowledge, tools, and expertise to safely assess the situation and implement effective solutions. Here are the professional steps involved:

a. Inspection and Assessment:

A professional technician will conduct a thorough inspection to assess the extent of the damage, identify the type of spring system, and evaluate the overall condition of the garage door.

b. Spring Replacement:

 Depending on the assessment, the technician will recommend the appropriate type of spring replacement. Garage doors typically use either torsion springs or extension springs, and the replacement process varies accordingly.

c. Balancing the Door:

After replacing the broken spring, the technician will balance the garage door to ensure even distribution of weight and smooth operation.

Proper balancing contributes to the longevity of the garage door system.

d. Inspection of Other Components:

 A comprehensive inspection of other door components, including cables, tracks, rollers, and hinges, will be conducted to identify any additional issues or potential weaknesses.

e. Lubrication and Maintenance:

The technician will lubricate moving parts and provide maintenance recommendations to optimize the performance and longevity of the garage door system.

f. Safety Checks:

Professional technicians prioritize safety and conduct thorough safety checks, including testing the auto-reverse feature of the garage door opener and ensuring that all safety mechanisms are functioning correctly.

g. Recommendations for Future Maintenance:

Based on the inspection, the technician may provide recommendations for future maintenance and best practices to extend the lifespan of the garage door system.

5. DIY Caution: What Not to Do When Dealing with Broken Garage Door Springs:

While it’s essential to take immediate actions, there are certain things homeowners should avoid when dealing with broken garage door springs:

a. Attempting DIY Repairs:

Garage door spring replacement is a complex task that requires specialized knowledge and tools. Attempting to repair or replace springs without professional expertise can lead to accidents and further damage.

b. Ignoring Safety Precautions:

Safety should be a top priority. Avoid attempting to manually open or close the garage door when a spring is broken, as this can lead to injuries and additional damage.

c. Neglecting Professional Assistance:

Broken Knoxville Garage Door Repair pose inherent risks, and seeking professional assistance is crucial. Neglecting to contact a professional technician may result in further complications and safety hazards.

Camco Commercial Door Company

853 East Wolf Valley Rd. Heiskell, TN 37754

1-865-776-9455

How Can I Assess Mold Damage In My Houston Home? – Mold Testing Houston- North Loop

Mold Testing Services Houston TX is a common concern for homeowners in Houston, Texas, given the region’s warm and humid climate. Assessing mold damage is crucial for maintaining a healthy living environment and preventing further structural deterioration.

In this comprehensive guide, we will explore effective methods to assess mold damage in your Houston home, providing insights into visual inspections, common signs of mold, and the importance of professional assistance.

  1. Visual Inspection:The first step in assessing mold damage is conducting a thorough visual inspection of your home. Here’s a step-by-step guide to help you in this process:a. Check Moisture-Prone Areas: Begin by examining areas of your home prone to moisture, such as basements, crawl spaces, bathrooms, and kitchens. Mold thrives in damp environments, making these areas more susceptible to infestations.b. Look for Visible Mold Growth: Inspect walls, ceilings, and other surfaces for visible mold growth. Mold may appear as discolored patches, spots, or fuzzy growth. Pay attention to areas with a musty odor, as it could indicate hidden mold.c. Examine Building Materials: Inspect building materials such as drywall, wood, and insulation. Mold can grow on or within these materials, leading to structural damage over time. Look for discoloration, warping, or signs of decay.d. Check HVAC Systems: Mold can also develop in HVAC systems and air ducts. Inspect these areas for mold growth, as contaminated air can spread mold spores throughout your home.e. Inspect Attics and Roof Spaces: Attics and roof spaces are susceptible to mold growth due to potential roof leaks or poor ventilation. Inspect these areas for signs of water damage and mold growth on insulation, rafters, and sheathing.f. Investigate Plumbing Fixtures: Check plumbing fixtures, including sinks, faucets, and pipes, for any signs of leaks. Mold often thrives in areas where water leaks are present.g. Examine Household Items: Assess household items such as carpets, upholstery, and stored belongings. Mold can grow on porous materials, and these items may need professional cleaning or disposal if severely contaminated.
  2. Common Signs of Mold Damage:While conducting your visual inspection, be vigilant for common signs of mold damage. These signs can help you identify areas that may require further investigation and remediation:a. Visible Mold Growth: Obvious mold growth on surfaces is a clear indicator of a mold issue. It can appear in various colors, including black, green, brown, or white.b. Musty Odor: A musty or earthy odor is often associated with mold growth. If you detect a persistent musty smell, it may indicate hidden mold in your home.c. Water Stains: Water stains on ceilings, walls, or floors are indicative of past or ongoing water damage. These areas are prone to mold growth and should be thoroughly examined.d. Discoloration: Discoloration on walls, ceilings, or other surfaces may signal mold growth. Look for patches that differ in color from the surrounding areas.e. Peeling Paint or Wallpaper: Peeling paint or wallpaper can be a result of water damage and may harbor hidden mold behind the affected surfaces.f. Warped or Buckled Materials: Warped or buckled materials, such as wood flooring or drywall, may indicate prolonged exposure to moisture and potential mold growth.g. Allergic Reactions: If you or your family members experience unexplained allergic reactions, respiratory issues, or other health concerns when inside the home, it could be attributed to mold contamination.
  3. Using Moisture Meters and Hygrometers:To assess mold damage accurately, consider using moisture meters and hygrometers to measure the moisture levels in your home. Elevated moisture levels create an environment conducive to mold growth. Here’s how to use these tools:a. Moisture Meters: Moisture meters are handheld devices that measure the moisture content of materials such as wood, drywall, and insulation. Use a moisture meter to identify areas with elevated moisture levels, indicating potential mold growth.b. Hygrometers: Hygrometers measure the humidity levels in the air. Indoor humidity levels should ideally be kept below 60% to prevent mold growth. Place hygrometers in various rooms to identify areas with high humidity.c. Focus on Hidden Areas: Use moisture meters and hygrometers in hidden or less accessible areas, such as behind walls or in crawl spaces. Hidden mold can be a significant concern, and these tools help in identifying moisture-prone areas.
  4. Professional Mold Inspection:While a DIY visual inspection is a valuable first step, it is advisable to seek professional assistance for a comprehensive mold inspection. Professional mold inspectors have the expertise and tools to assess mold damage thoroughly. Here’s why professional assistance is crucial:a. Identification of Hidden Mold: Professionals have the knowledge and equipment to identify hidden mold that may not be visible during a DIY inspection. Mold can thrive in concealed spaces, such as within walls or beneath flooring.b. Accurate Mold Species Identification: Professional mold inspectors can accurately identify the species of mold present. Different mold species may require specific remediation strategies, and professionals can provide tailored recommendations.c. In-Depth Moisture Assessment: Professionals conduct in-depth moisture assessments to identify the source of water intrusion. Addressing the root cause of moisture is essential for effective mold remediation.d. Comprehensive Reporting: A professional mold inspection includes a detailed report outlining findings, recommendations, and a plan for remediation. This comprehensive report serves as a valuable guide for addressing mold issues.e. Prevention Strategies: Professionals can provide insights into preventive measures to avoid future mold issues. This may include recommendations for improving ventilation, addressing water leaks, and maintaining optimal indoor humidity levels.
  5. DIY Mold Testing Kits:If you prefer an initial assessment before seeking professional help, you can use DIY mold testing kits available in the market. These kits typically include instructions for collecting air or surface samples, which are then sent to a laboratory for analysis. However, it’s essential to consider the limitations of DIY kits:a. Limited Accuracy: DIY kits may provide limited accuracy compared to professional mold testing. Interpretation of results can be challenging without expert knowledge.b. Inability to Identify Hidden Mold: DIY kits may not effectively identify hidden mold, which professionals can detect using advanced equipment.c. Professional Verification: Consider using DIY kits as a preliminary step, with the understanding that professional verification may be necessary for a more accurate assessment.
  6. Addressing Mold Remediation:Once mold damage has been assessed, it’s crucial to proceed with remediation to eliminate the mold and prevent its recurrence. Here are steps to consider:a. Identify and Address the Source of Moisture: Effective mold remediation starts with identifying and addressing the source of moisture. Whether it’s a leaky roof, plumbing issues, or high humidity, resolving the underlying problem is essential.b. Isolate Contaminated Areas: Isolate areas with mold contamination to prevent the spread of mold spores to unaffected areas. This may involve sealing off rooms or using containment barriers.c. Remove Mold-Contaminated Materials: Remove and safely dispose of mold-contaminated materials, such as drywall, insulation, or carpets. Proper protective gear, including masks and gloves, should be worn during this process.d. Cleaning and Disinfection: Clean surfaces with mold-killing solutions to eliminate remaining spores. HEPA vacuuming and thorough cleaning are crucial for ensuring that all visible mold is removed.e. Ventilation and Drying: Improve ventilation in affected areas and use dehumidifiers to reduce humidity levels. Proper drying is essential to prevent future mold growth.f. Professional Remediation Services: Consider hiring professional mold remediation services for extensive or severe mold damage. Professionals have the expertise, equipment, and safety protocols to handle complex remediation projects.

Conclusion:

Mold Testing Services Houston TX in your Houston home requires a combination of visual inspections, identification of common signs, and, in some cases, the use of specialized tools. While a DIY assessment is a valuable first step, seeking professional assistance for a comprehensive mold inspection is highly recommended. Professional inspectors can accurately identify hidden mold, assess moisture levels, and provide detailed reports with remediation recommendations. Addressing mold damage promptly is crucial for maintaining a healthy indoor environment and preventing further structural deterioration. By combining DIY assessments with professional insights, homeowners can take proactive steps to address and remediate mold issues effectively.

Mold Testing Houston- North Loop

2950 N Loop W #500, Houston, TX 77092

1-832-409-2125

dWhat Are The Qualities Of An Exceptional Garage Door Repair Technician? – Brothers Garage Door Service

When it comes to the functionality and security of your home, the Garage Door Repair Livonia MI plays a vital role. In the event of a malfunction or damage, the expertise of a skilled garage door repair technician becomes indispensable.

Hiring the right professional ensures that your garage door is restored to optimal condition efficiently and effectively. In this article, we’ll explore the essential qualities that make a garage door repair technician exceptional.

1. Technical Expertise:

One of the primary qualities of a top-notch garage door repair technician is technical expertise. A skilled technician should have a deep understanding of various garage door systems, components, and mechanisms. This includes knowledge of different types of garage doors, drive systems (such as chain-drive, belt-drive, and screw-drive), and the ability to diagnose and fix a range of issues, from simple to complex.

2. Experience in the Industry:

Experience is a key factor in gauging the competence of a garage door repair technician. An experienced professional has likely encountered a diverse array of garage door problems and developed effective solutions. Whether it’s repairing a malfunctioning opener, replacing springs, or troubleshooting electrical issues, an experienced technician brings valuable insights and problem-solving skills to the job.

3. Attention to Detail:

Garage doors consist of intricate systems with numerous moving parts. A good repair technician must possess a keen attention to detail to identify the root cause of an issue accurately. Whether it’s inspecting springs, cables, rollers, or sensors, a meticulous approach ensures that no potential problems are overlooked, leading to thorough and effective repairs.

4. Excellent Problem-Solving Skills:

Garage door issues can be complex, and a skilled technician must be an adept problem solver. From identifying the source of a malfunction to determining the most efficient repair method, the ability to analyze situations and devise effective solutions is crucial. A good technician should be resourceful and creative when faced with challenging repair scenarios.

5. Strong Communication Skills:

Effective communication is paramount in any service-oriented profession, and garage door repair is no exception. A good technician should be able to explain the issue to the homeowner in clear and understandable terms. Additionally, they should provide information on the repair process, potential solutions, and preventive maintenance tips. Clear communication fosters trust and ensures that homeowners are well-informed throughout the repair process.

6. Professionalism and Reliability:

Professionalism is a cornerstone of exceptional service. A reliable garage door repair technician should be punctual, respectful, and professionally conduct themselves. This includes arriving on time for appointments, providing accurate estimates, and adhering to ethical standards in all interactions with homeowners.

7. Up-to-Date Knowledge of Technology:

As garage door technology evolves, a good repair technician should stay abreast of the latest advancements. This includes knowledge of smart garage door openers, integrated security systems, and other technological features. Being well-versed in modern garage door technology ensures that the technician can effectively diagnose and repair advanced systems.

8. Safety Consciousness:

Working with garage doors involves handling heavy components and potentially hazardous situations. A good garage door repair technician prioritizes safety at all times. This includes following safety protocols, using appropriate safety gear, and ensuring that repair processes are conducted with the utmost care to prevent accidents or injuries.

9. Customer-Centric Approach:

Exceptional customer service is a hallmark of a reputable garage door repair technician. A customer-centric approach involves actively listening to the homeowner’s concerns, addressing questions, and ensuring that the customer feels confident and satisfied with the repairs. A positive customer experience contributes to the technician’s overall professionalism and reputation.

10. Honesty and Transparency:

Integrity is a non-negotiable quality for a reliable garage door repair technician. Honesty and transparency in providing estimates, outlining repair options, and discussing potential issues foster trust between the technician and the homeowner. A technician who is forthright about costs, timelines, and the overall repair process instills confidence in their services.

Conclusion: The Recipe for Exceptional Garage Door Repairs:

In the world of Garage Door Repair Livonia MI, the qualities of a skilled technician go beyond technical expertise. A combination of experience, attention to detail, problem-solving skills, communication abilities, professionalism, up-to-date knowledge, safety consciousness, customer-centric approach, and honesty creates the recipe for an exceptional garage door repair technician.

When seeking repair services for your garage door, prioritize technicians who embody these qualities. By doing so, you can ensure that your garage door is in capable hands, receiving the attention and expertise needed for efficient and effective repairs. Whether it’s a routine maintenance task or addressing a complex issue, a skilled and reputable technician can make all the difference in the performance and longevity of your garage door system.

Brothers Garage Door Service

29522 Wentworth St, Livonia, MI 48154, United States

1-734-292-0971